| Content |

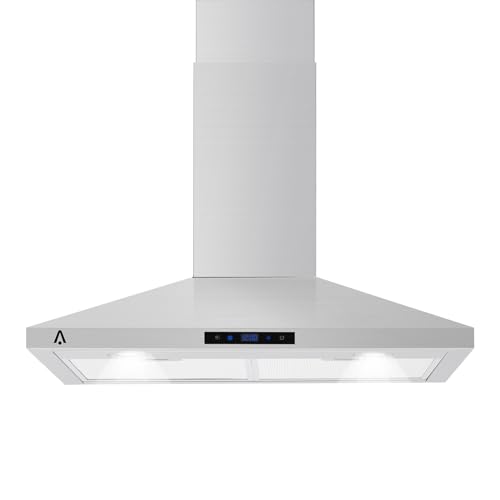
Elevate your kitchen with the ThinkMax 30 Inch Wall Mount Range Hood
ThinkMax 30 Inch Wall Mount Range Hood: Modern Efficiency Meets Style
Transform your kitchen ventilation with our powerful 265 CFM range hood. Designed for performance and elegance, it's the perfect combination of functionality and modern aesthetics.
Why Choose ThinkMax?
Powerful Performance
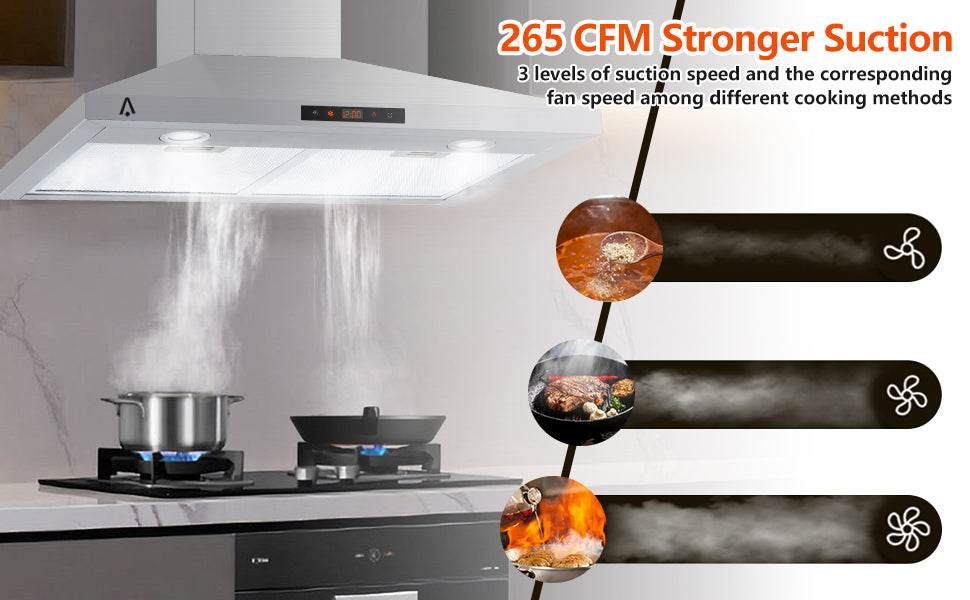
265 CFM suction power effectively removes smoke, odors, and cooking fumes, keeping your kitchen fresh and clean.
Premium Construction
Built with high-quality stainless steel for durability and easy maintenance, ensuring long-lasting performance.
Smart Controls
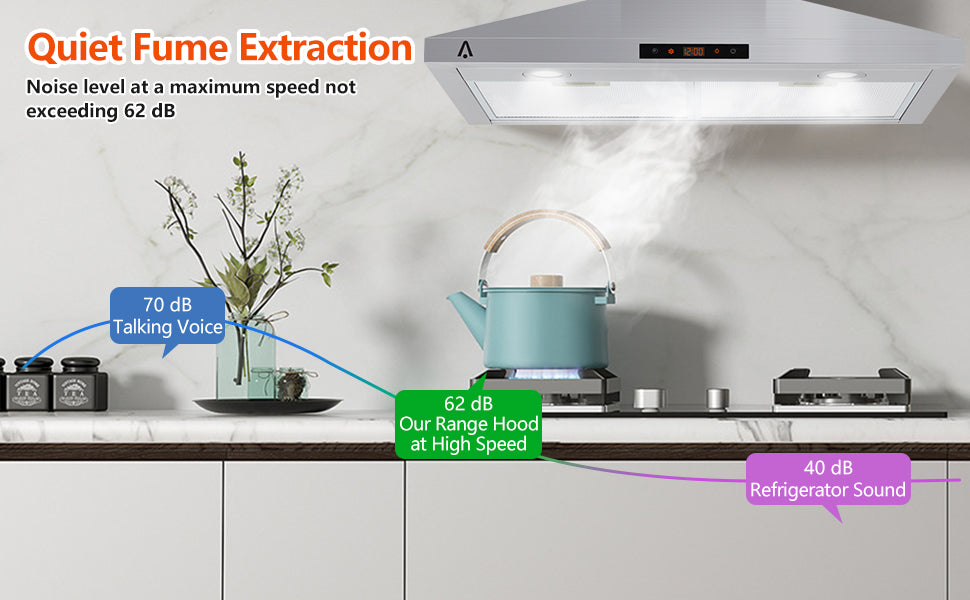
3-speed touch control system with quiet operation lets you adjust ventilation to your exact needs.
Superior ventilation with modern touch controls
Features That Perform
With its sleek design, powerful suction, and quiet operation, this range hood combines performance with convenience. The stainless steel construction ensures durability while maintaining an elegant appearance.
Versatile installation options for any kitchen setup
Versatile Installation
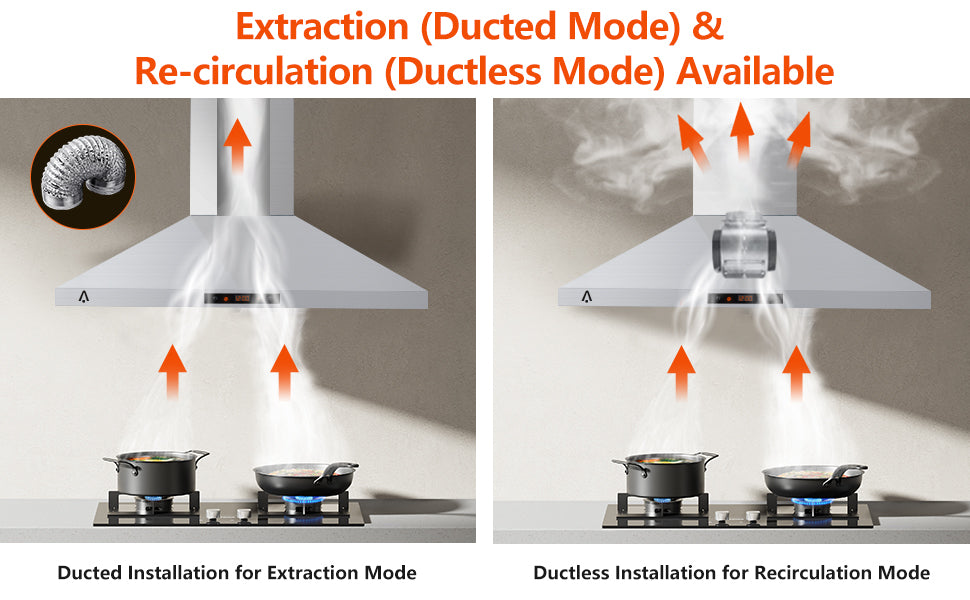
The convertible ducted/ductless venting system provides flexible installation options to suit any kitchen layout. Bright LED lighting ensures optimal visibility while cooking.
Perfect dimensions for standard 30-inch cooktops
Smart Design Meets Superior Function
Every detail has been carefully considered, from the efficient 265 CFM motor to the touch control panel and LED lighting system, creating the perfect balance of form and function.
Key Features
- Powerful 265 CFM suction for effective smoke and odor removal
- Premium stainless steel construction for durability
- 3-speed touch control with quiet operation
- Convertible ducted/ductless venting options
- Bright LED lights with dual brightness levels
- Easy-to-clean design and maintenance
- Modern aesthetic that complements any kitchen style
Experience superior kitchen ventilation
Specifications
| Brand |
ThinkMax |
| Noise |
60 dB |
| Color |
Silver |
| Voltage |
110 |
| Airflow Displacement |
265 Cubic Feet Per Minute |
| Material Type |
Stainless Steel |
| Special Features |
Stainless Steel Baffle Filters, 3 Fan Speeds, LED Lighting |
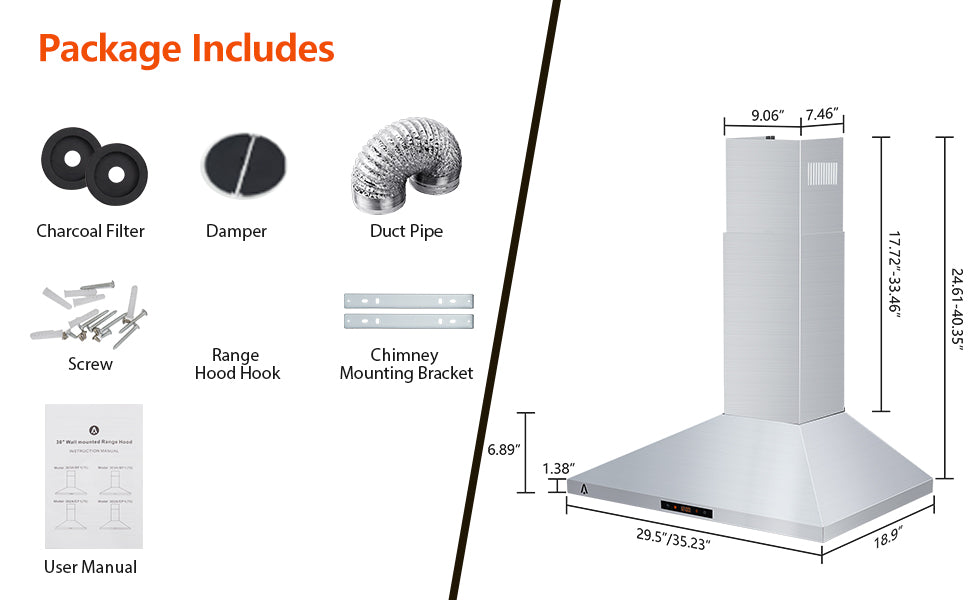
| Included Components |
1x Range Hood, 1x User Manual |
| Product Dimensions |
18.9 x 25.9 x 6.89 inches |
| Item Weight |
19.84 pounds |
|

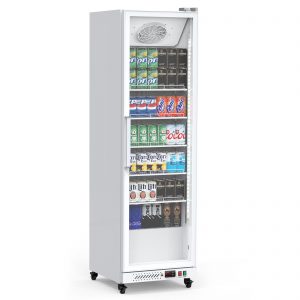
Elevate your business with the ThinkMax Commercial Display Refrigerator
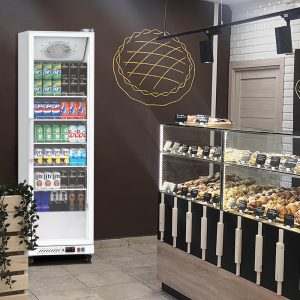
ThinkMax Commercial Display Refrigerator: Professional Cooling Solution
Enhance your retail space with our professional-grade display refrigerator. Designed for optimal performance and visibility, it's the perfect solution for showcasing beverages and perishables in style.
Why Choose ThinkMax?
Large Storage Capacity
11.6 Cu. Ft. capacity with adjustable shelves provides ample space for organizing and displaying a wide variety of products.
Advanced Temperature Control
Maintains consistent temperature between 0-10??C, perfect for keeping beverages and food items at their optimal serving temperature.
Premium Glass Door
Double-layer glass construction prevents fogging and condensation, ensuring clear product visibility at all times.

Designed for maximum visibility and efficient cooling
Features That Perform
With its frost-free design and efficient cooling system, this refrigerator combines professional-grade performance with user-friendly features, making it ideal for commercial environments.

The perfect solution for commercial beverage display
Exceptional Performance
Experience worry-free operation with our frost-free technology and precise temperature control. The ThinkMax Display Refrigerator ensures your products stay perfectly chilled while maintaining clear visibility.
Key Features
- Spacious 328L/11.6 Cu. Ft. capacity
- Precise temperature control (0-10??C)
- Double-layer glass door with anti-fog technology
- Premium condensation prevention
- Frost-free operation
- Adjustable shelving system
- Efficient drink organizers

Maximize your product presentation and sales
Specifications
| Brand |
ThinkMax |
| Color |
Black |
| Capacity |
11.6 Cu. Ft. (328L) |
| Temperature Range |
0-10??C |
| Door Type |
Double-layer Glass |
| Defrost Type |
Frost-free |
| Product Dimensions |
21.7 x 23.9 x 75.8 inches |
| Weight |
35.6 Pounds |
|
|
|
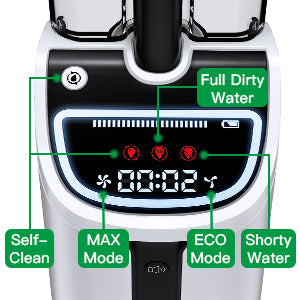
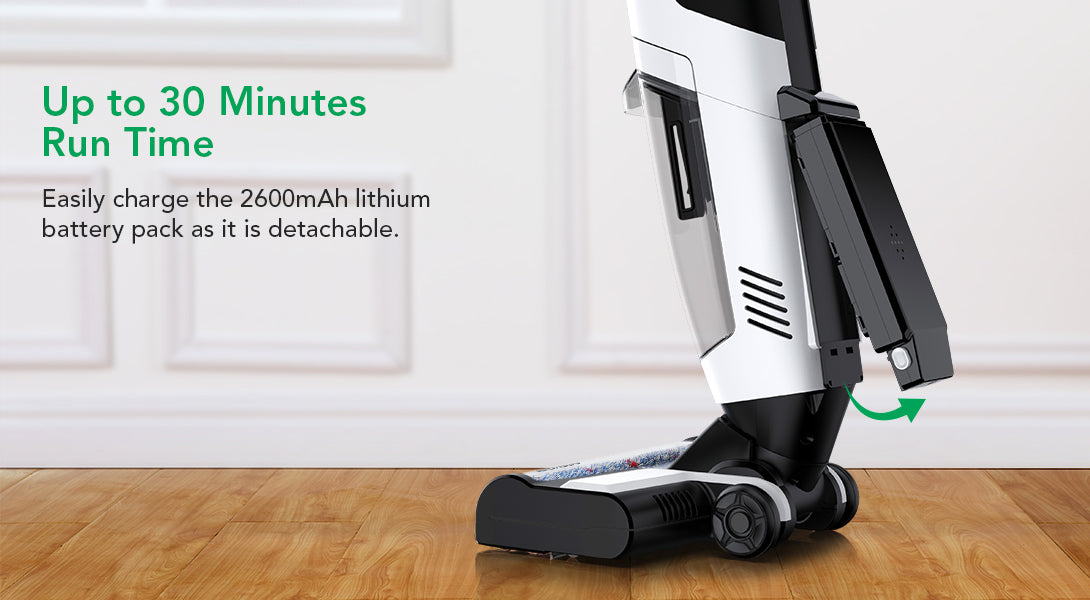
Convenient LED Display
The LED display allows you to know the remaining battery capacity, mode, working time, water tank state, fault prompt, water shortage prompt, cleaning prompt, etc. |
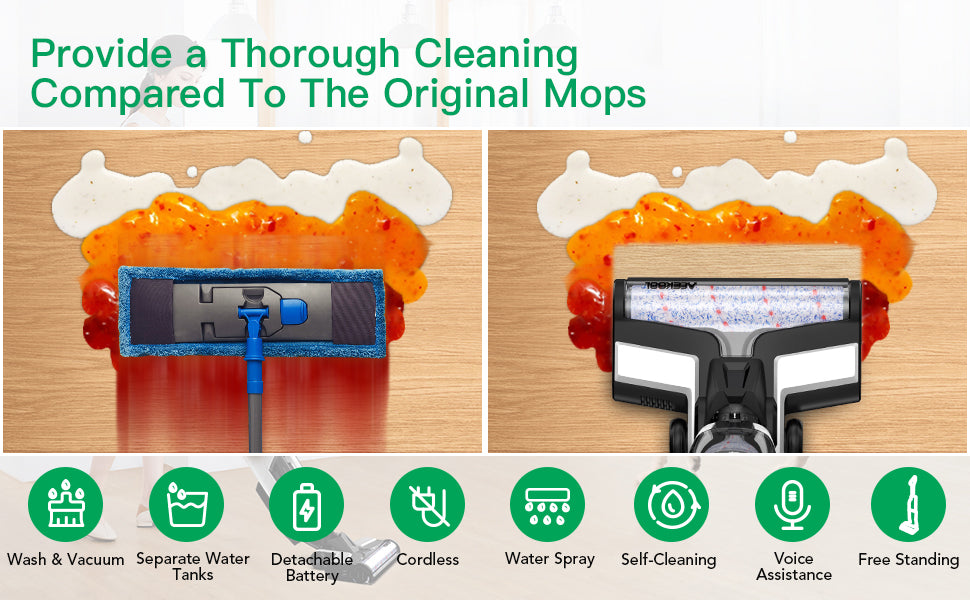
| All-in-one Vacuum Cleaner
Vacuum, wash and mop at the same time in one easy step, no water stains left. First choice for pet families, saving 50% housework time! Powerful suction for multi-surfaces. |
|
|
|
Separate Two-tank Design
Keep clean water and dirty water separated. Simple to take apart and assemble. 2Pcs washable HEPA filters, no need to buy replacement. |
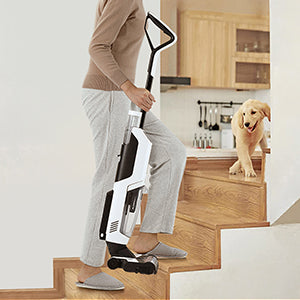
| Lightweight and No Cord
This wet and dry vacuum cleaner is very light and portable, can be easily lifted and stored in the corner without worrying about being too bulky. |
|
|
|
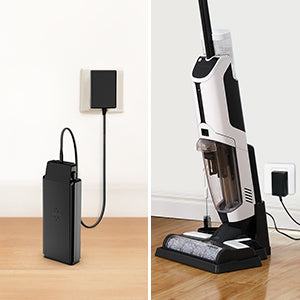
Two Charge Methods
Up to 30mins working time with 25V/2600mAH lithium-ion battery. Our vacuum mop provides 2 charging choices: charge the whole device on the charging station or plug the AC adapter directly into battery. |
Specifications??/strong>
| Brand |
|
| Model Number |
VU1 |
| Working Time |
30 min |
| Charging Time |
4 h |
| Water Tank Capacity |
680 mL |
| Dirty Water Tank Capacity |
450 mL |
| Material |
ABS, Aluminum Alloy |
| Adapter Voltage |
(100 to 240) V, 60 Hz |
| Output Voltage |
30 V, 0.8 A |
| Power |
150 W |
| Battery Type |
Li-ion Battery |
| Battery Capacity |
2600 mAh |
| Battery Voltage |
25.2 V |
| Net Weight |
4.3 kg / 9.5 lb |
| Dimensions |
(L11.4 x W9.8 x H45.3) in |
| Package Contents |
1 x Handle, 1 x Main Body, 1 x Li-ion Battery Pack, 1 x Roller Brush, 1 x HEPA Filter, 1 x HEPA Hard Brush, 1 x Cleaning Tool, 1 x Drying Tray, 1 x Charging Station, 1 x Adapter, 1 x User Manual |
|
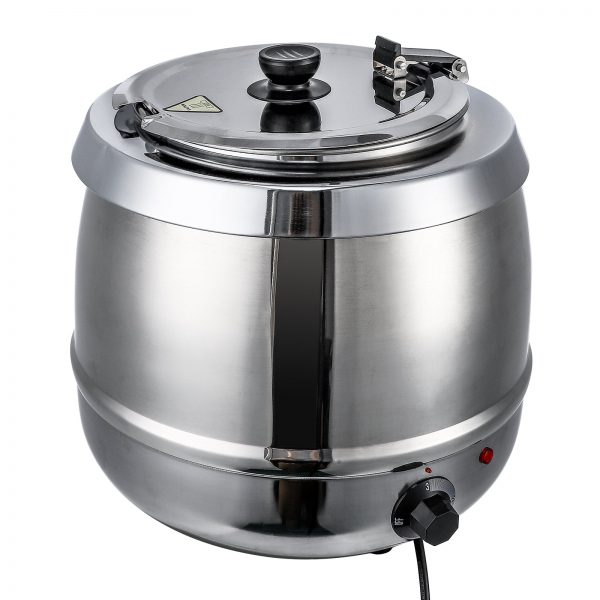
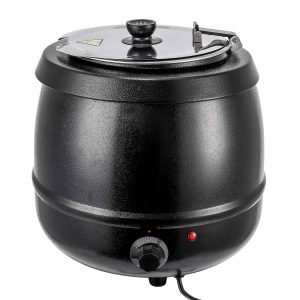
ThinkMax Commercial Soup Kettle
Perfect for Every Occasion
- Keeps Your Food Warm
- Durable
- Large Capacity
User-Friendly Design
Enjoy hassle-free operation with our intuitive controls:
- Easy-to-use temperature adjustment
- Maintain the perfect serving temperature for soups, sauces, or gravies
- Ideal for both experienced chefs and catering novices
Generous 10.5-Quart Capacity
Serve with confidence using our ample 10.5-quart capacity soup warmer:
- Perfect for catering events, buffets, and large family gatherings
- Ideal for soups, stews, chili, and more
- Ensures everyone is satisfied with generous portions
Additional Features

Stainless steel hinged no-drip lid
Allows cover to be opened but not removed during service.

Food Grade 304 Stainless Steel
Easy to install and simple to use.
The inner container is made of stainless steel material.
Product Specifications
| Brand |
ThinkMax |
| Capacity |
10.5 Quarts |
| Material |
Stainless Steel |
| Color |
Sliver |
| Dimensions |
11.8"D x 11.8"W x 14.6"H |
| Weight |
10.78 pounds |
| Finish Type |
Polished |
Why Choose the ThinkMax 10.5-Quart Soup Warmer?
- Perfect for large gatherings and commercial use
- Durable cast iron construction for long-lasting performance
- User-friendly controls for precise temperature management
- Excellent heat retention for consistently warm dishes
- Easy to clean, saving you time and effort
|
Specifications
| Brand |
ThinkMax |
| Model |
PR50 |
| Power Source |
AC |
| Material |
Glass |
| Finish Type |
Lacquered |
| Installation Type |
Both Recessed and Wall Mounted are Available |
| Heat Output |
5100 |
| Special Feature |
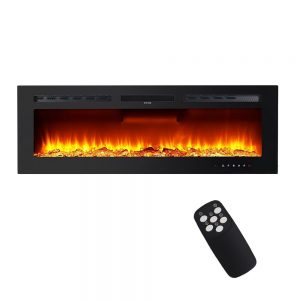
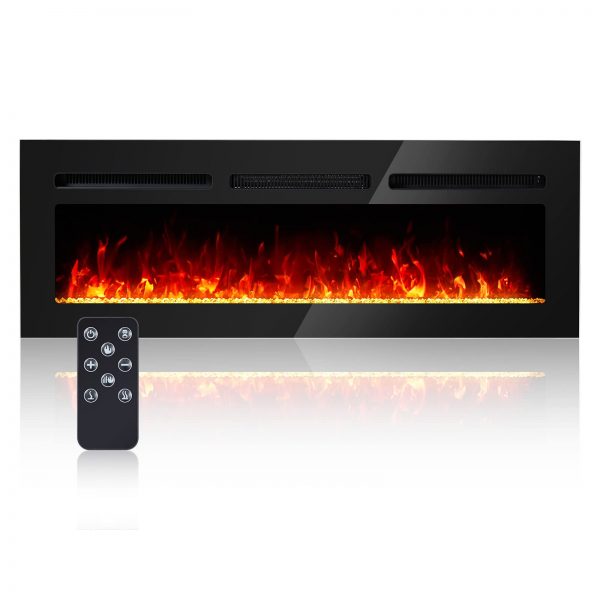
Remote and touch screen make it more convenient to control every function of electric fireplace |
| Style |
Modern |
| Color |
12 Color |
| Room Type |
Bedroom, Living Room |
| Ventilation Type |
Vent Free |
| Heating Coverage |
400 square feet |
| Included Components |
remote control |
| Package Dimensions |
6.3"D x 50"W x 17.72"H |
| Item Weight |
58 pounds |
|
Remote Control
The upgraded remote control with a larger backlit LCD screen makes it easy and clear to operate. You can set the comfort temperature setting as you like even in the middle of the night.
Easy To Install
1. connect the hose connector to one end of the exhaust hose 2. Connect the window kit adapter to the other edn of the exhaust hose; 3. Extend the adjustable window kit to the length of your window; 4. Attach the hose connector to the exhaust air outlet of the unit; 5. Extend the exhaust hose and insert it into the window kit
Sleeping mode
The max sound level produced is around 50 dB. For quieter and economical nighttime cooling, using the sleep mode. Sleep mode lowers the fan speed and raises the temperature slightly during the night.

Specifications
| Product Dimensions |
21 x 18.5 x 34.3 inches |
| Item Weight |
80 pounds |
| Form Factor |
Portable |
| Specifications |
Energy Star |
| Warranty Description |
1 |
| Batteries required |
No |
| Included Components |
Portable Air Conditioners |
| Capacity |
700 Quarts |
| Floor Area |
700 Square Feet |
| Voltage |
115 Volts (AC) |
| Noise Level |
48 dB |
|


Shinneen Muir –
The 5-layer aluminum filter is a game-changer – it effectively traps grease and eliminates cooking odors. I love how easy it is to clean, simply pop it in the dishwasher for hassle-free maintenance. Cooking in a fresh kitchen has never been easier thanks to this range hood.
YJ –
This range hood served as a basic replacement for the broken NuTonerange hood that came with our house. The old NuTone unit was completely nonfunctional, prompting us to purchase this new one. The product arrived adequately packaged, with only a minor dent in the upper fold on the back of the unit that was hardly noticeable, so we opted not to request a replacement.The NuTone hood I removed had a recess in the top, and the electrical supply from the wall was positioned near the top of the unit about 3 inches over from the corner. In contrast, this unit had a completely flush top with knockouts on the top and rear, about 7 inches in from the corner. To align the power supply with the knockout, I had to cut a section of drywall behind the hood. While this wasn’t a major issue, it was a bit inconvenient.The package included instructions for a recessed cabinet installation, but the unit out of the box was designed for a flush bottom cabinet. Since my cabinets had recessed bottoms, I decided to use longer wood screws with washers to secure the range hood to the bottom shelf in the rear and smaller holes on the front lip of the hood to attach to the front fascia of the cabinet. It was essential to drill pilot holes for the screws, and a 1/8″” drill bit worked perfectly. Once the hood was hung, I made the electrical connections. Note that wire nuts were not provided, so ensure you have some on hand.Overall, the installation process went smoothly, and the unit is securely in place and functioning perfectly. The switches feel sturdy, and we added two LED bulbs and a duct pipe, improving visibility while cooking. Now, we can see what we’re cooking with ease.
Riley Parris –
I purchased this stainless steel range hood as a budget-friendly replacement for my old one that had stopped working. Since we plan to install an over-the-range microwave in the near future, I didn’t want to invest in an expensive hood. However, we needed an exhaust fan in the meantime.The installation process was incredibly straightforward. It took me less than 10 minutes, with only a couple of minutes spent walking up and down the stairs to switch the power on and off in the kitchen.When the package arrived, I found that the box had been left wide open at my door. This was a first for me with Garvee, and it initially caused some concern. However, upon close inspection, everything was in good condition. The only items in the box were the hood – which was undamaged despite the box being open – and an instruction booklet that I didn’t need to use. The mounting screws were located in a plastic bag under the wiring cover, which had to be removed during installation. Initially, I thought the screws were missing, but I later found them underneath the cover. Be sure to check under the cover for the screws!Given that my cabinets have a frame ledge that hangs down 1/2″” below the cabinet on the front and back, I had to use a 1/2″” spacer board between the hood and the cabinet or drill new holes in the hood at the front and back edges to screw into the ledges for mounting. I opted to drill new holes in the hood, using a 3/16 drill bit that worked perfectly with the included screws.I then removed the back wire tab on the hood using a flat-head screwdriver, turned off the power to the kitchen, and passed the power wires from the wall through the tab hole.With my wife’s assistance, I held the lightweight range hood up to the cabinet, ensured we were happy with the placement, and quickly secured the hood to the cabinet with the four included screws. This step took less than 2 minutes.Finally, I connected the white wires from the range hood to the white wire from the wall, the black wires to the black, and attached the ground wire from the wall to the greenish/blue screw on the hood. I then turned the power back on and tested the hood, which worked perfectly.Enjoy your new range hood!
Brittany –
I am glad to hear that the packaging of the range hood was excellent and that it arrived without any dents, scrapes, or scratches.The mounting system of this range hood is better than your previous one, and its lightweight design gives you confidence that the anchors you used are sufficient for installation.Your decision to choose this particular range hood because of the position of the lights was strategic. Having the lights in the front rather than the back provides better lighting for the stovetop, which is a practical feature.It’s fantastic to hear that this hood is much quieter than your previous one. While you haven’t tested its performance in removing smoke, steam, or odors yet, you have high hopes for its effectiveness.The fact that the covers can be easily removed and washed in the dishwasher is a convenient feature that you plan to take advantage of regularly, possibly once a week.Lastly, the digital display and touch buttons on the hood have impressed you, providing a clean and modern interface. Overall, you are very pleased with this range hood and its features.
Choi Jung Min –
I am really happy with my new range hood! It’s incredibly convenient to use, thanks to the built-in lighting, adjustable speed settings, and effective filtration.The lights make it easy to see what I am cooking, and I can adjust the fan speed depending on how much smoke and grease there is. It truly enhances my cooking experience and makes cleanup so much easier.
Jassie –
Looks good.