| Content |

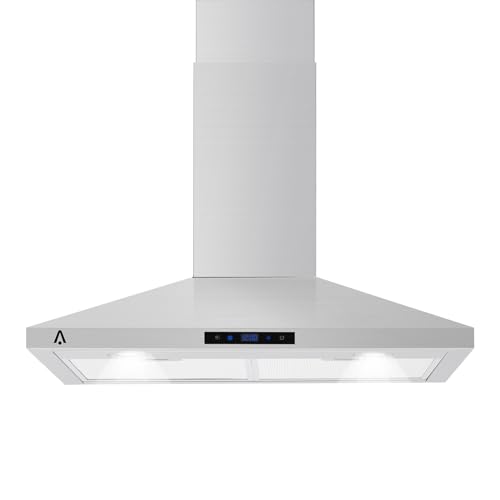
Elevate your kitchen with the ThinkMax 30 Inch Wall Mount Range Hood
ThinkMax 30 Inch Wall Mount Range Hood: Modern Efficiency Meets Style
Transform your kitchen ventilation with our powerful 265 CFM range hood. Designed for performance and elegance, it's the perfect combination of functionality and modern aesthetics.
Why Choose ThinkMax?
Powerful Performance
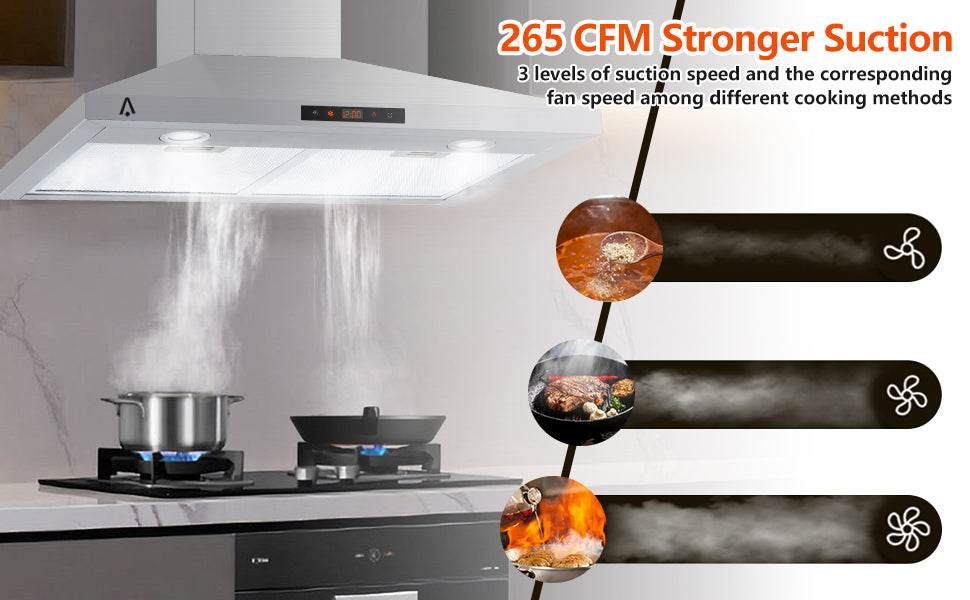
265 CFM suction power effectively removes smoke, odors, and cooking fumes, keeping your kitchen fresh and clean.
Premium Construction
Built with high-quality stainless steel for durability and easy maintenance, ensuring long-lasting performance.
Smart Controls
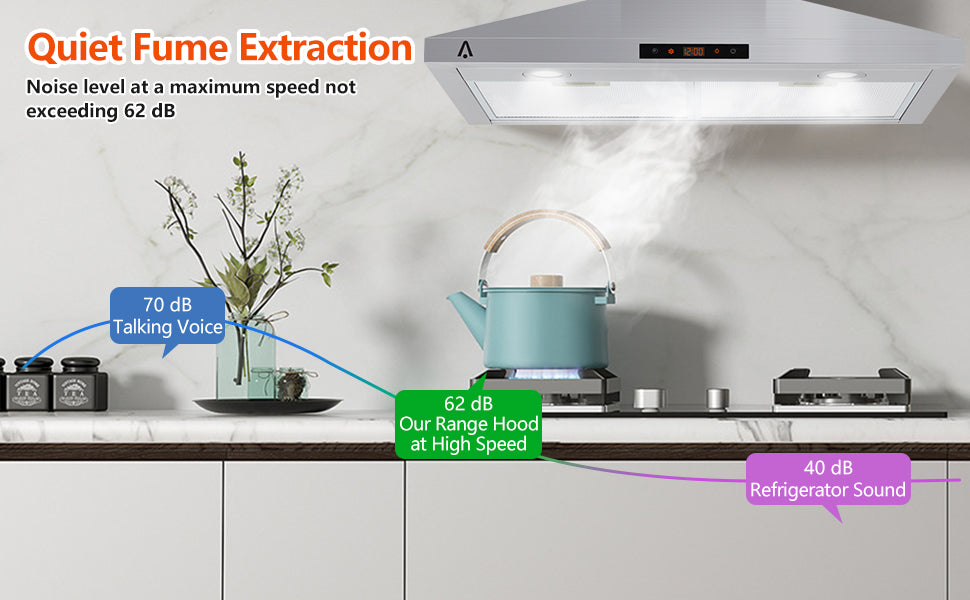
3-speed touch control system with quiet operation lets you adjust ventilation to your exact needs.
Superior ventilation with modern touch controls
Features That Perform
With its sleek design, powerful suction, and quiet operation, this range hood combines performance with convenience. The stainless steel construction ensures durability while maintaining an elegant appearance.
Versatile installation options for any kitchen setup
Versatile Installation
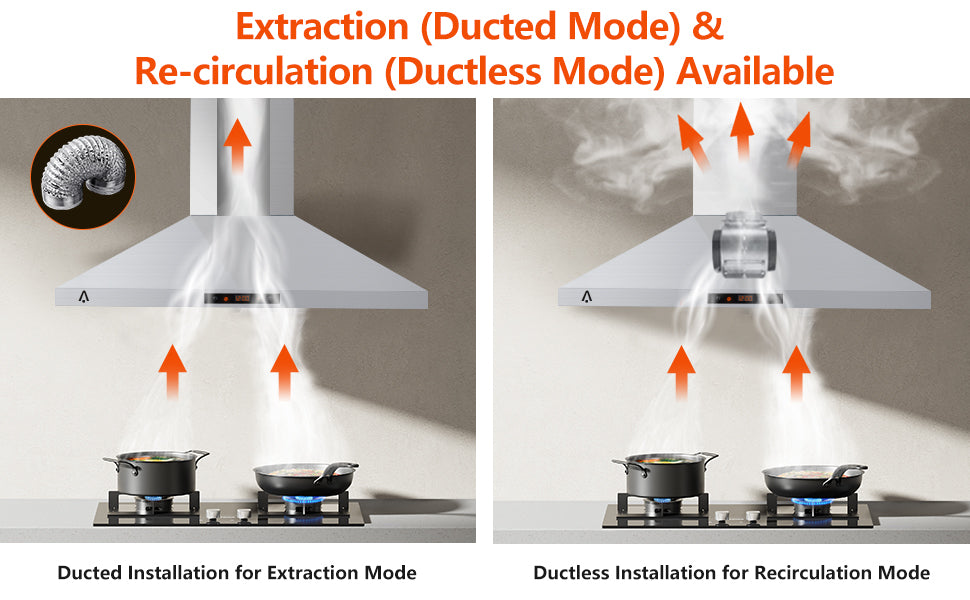
The convertible ducted/ductless venting system provides flexible installation options to suit any kitchen layout. Bright LED lighting ensures optimal visibility while cooking.
Perfect dimensions for standard 30-inch cooktops
Smart Design Meets Superior Function
Every detail has been carefully considered, from the efficient 265 CFM motor to the touch control panel and LED lighting system, creating the perfect balance of form and function.
Key Features
- Powerful 265 CFM suction for effective smoke and odor removal
- Premium stainless steel construction for durability
- 3-speed touch control with quiet operation
- Convertible ducted/ductless venting options
- Bright LED lights with dual brightness levels
- Easy-to-clean design and maintenance
- Modern aesthetic that complements any kitchen style
Experience superior kitchen ventilation
Specifications
| Brand |
ThinkMax |
| Noise |
60 dB |
| Color |
Silver |
| Voltage |
110 |
| Airflow Displacement |
265 Cubic Feet Per Minute |
| Material Type |
Stainless Steel |
| Special Features |
Stainless Steel Baffle Filters, 3 Fan Speeds, LED Lighting |
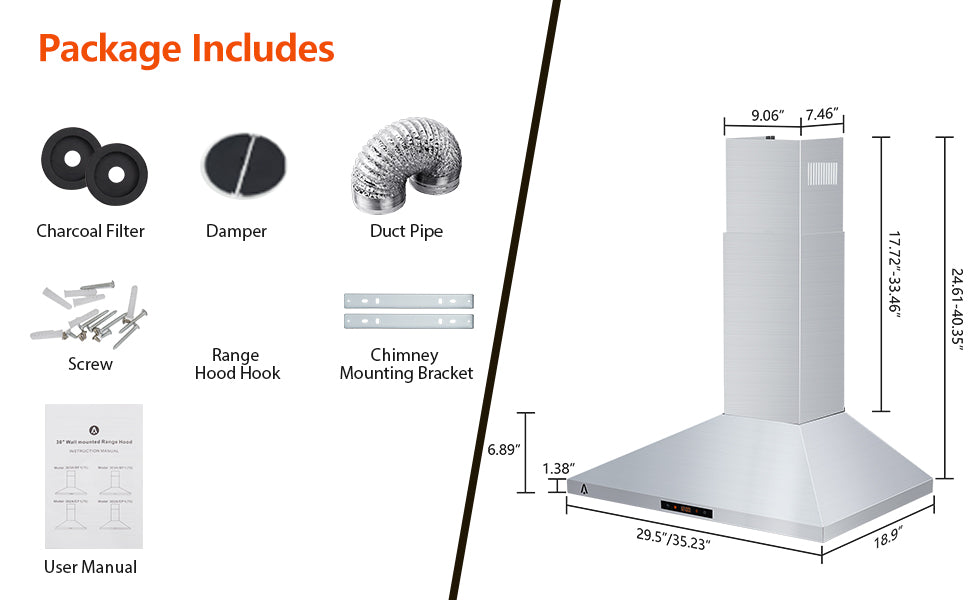
| Included Components |
1x Range Hood, 1x User Manual |
| Product Dimensions |
18.9 x 25.9 x 6.89 inches |
| Item Weight |
19.84 pounds |
|

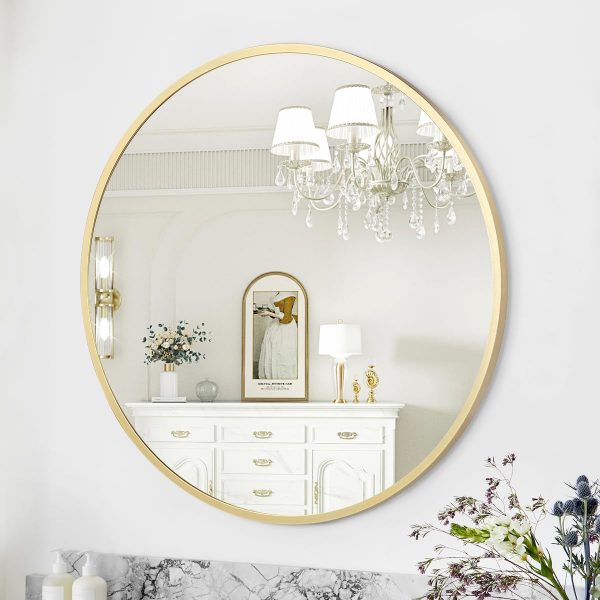
Elevate your space with the ThinkMax Round Gold Mirror
ThinkMax Round Gold Mirror: Where Style Meets Functionality
Transform any room with our stunning 30-inch round gold mirror. Designed for both aesthetics and practicality, it's the perfect addition to your bathroom, entryway, or living room.
Why Choose ThinkMax?
HD Eco-Friendly Mirror
Crystal clear reflection with an environmentally conscious design, ensuring both quality and sustainability.
Matte Black Metal Frame
Sleek and modern frame that adds a touch of elegance to any interior decor style.
Easy Installation
Simple mounting process allows for quick and hassle-free setup in any room of your choice.

Designed for versatility and contemporary style
Features That Impress
With its HD eco-friendly glass and stylish matte black frame, this mirror combines sophistication with sustainability. The easy installation process ensures you can enjoy your new mirror in no time.

The perfect accent piece for any room in your home
Versatile Elegance
The ThinkMax Round Gold Mirror isn't just a reflection - it's a statement piece. Suitable for various spaces from bathrooms to entryways, it adds depth and light to any room, enhancing your home's overall ambiance.

Perfectly sized to make a statement in any space
Timeless Design Meets Modern Functionality
With its generous 30-inch diameter and sleek gold finish, the ThinkMax Round Mirror combines timeless elegance with contemporary style, making it a versatile addition to any home decor.
Key Features
- HD eco-friendly mirror for crystal clear reflections
- Stylish matte black metal frame for a modern touch
- Easy installation process for quick setup
- Versatile design suitable for bathrooms, entryways, and living rooms
- 30-inch diameter perfect for making a statement
- Durable construction for long-lasting use
- Adds depth and light to any space

Transform your space with elegant reflections
Specifications
| Brand |
ThinkMax |
| Room Type |
Bathroom, Dressing Room, Bedroom, Hallway, Dining Room, Entryway |
| Shape |
Round |
| Product Dimensions |
33.4"L x 33.4"W |
| Frame Material |
Aluminum |
| Style |
Modern |
| Mounting Type |
Wall Mount |
| Finish Type |
Polished |
| Surface Recommendation |
Wall |
| Special Feature |
Unlit |
| Color |
Gold |
| Number of Items |
1 |
| Material |
Glass |
| Assembly Required |
Yes |
| Item Weight |
7.5 pounds |
|
5 QT Round Chafing Dishes for Buffet with Glass Lid 2 Pack

Specifications
| Product Dimensions |
16.54 x 15 x 11 inches |
| Item Weight |
12.82 pounds |
|
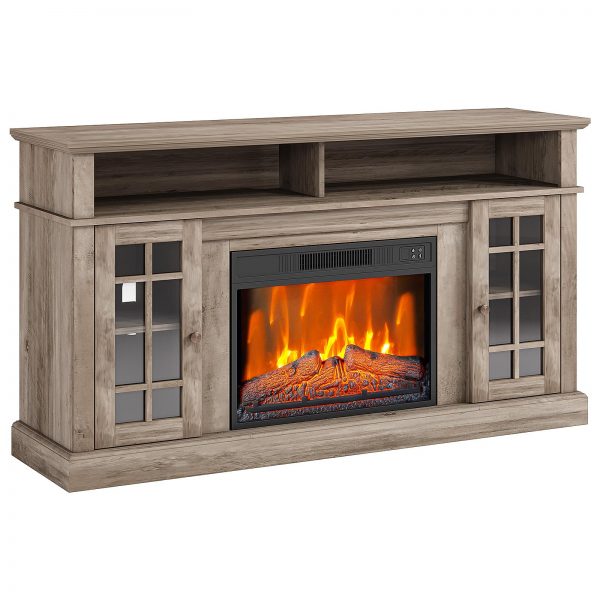
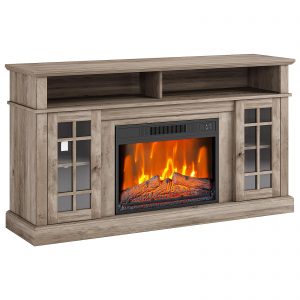
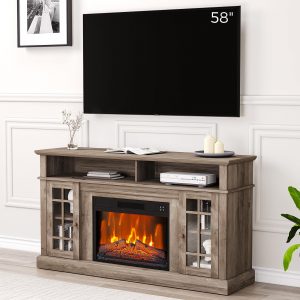
ThinkMax Electric Fireplace TV Stand
Rustic Elegance Meets Modern Comfort

Easy-to-Use Remote Control

Realistic Flame Effect for a Cozy Atmosphere

-
Realistic 3D Flame Effect:?Enjoy a cozy atmosphere?with glowing logs and embers, without the mess of a real fireplace.
-
Classic Design:?Exquisite sliding barn doors and vintage metal accents create a rustic, elegant living room centerpiece.
-
Ample Storage:?Open shelves and hidden storage behind barn doors keep your space organized and clutter-free.
-
23-Inch Remote Control Fireplace:?Adjust flame brightness, heat settings, and timer with ease.
-
Sturdy Construction:?High-quality MDF and particle board ensure excellent stability and high load-bearing capacity.
Classic minimalist farmhouse style fireplace

?3D Flame Effect & Comfort

Rustic Charm Meets Modern Functionality

Perfect for Any Living Space

Specifications
| Brand |
ThinkMax |
| Power Source |
Corded Electric |
| Product Dimensions |
67"D x 29"W x 17"H |
| Material |
Metal |
| Finish Type |
Brushed |
| Installation Type |
Freestanding |
| Heat Output |
100 |
| Special Feature |
Tv Stand |
| Style |
Farmhouse |
| Color |
Wood Color |
| Room Type |
Living Room |
| Ventilation Type |
Vent Free |
| Included Components |
Electric Fireplace TV Stand |
| Item Weight |
112 pounds |
| Model Name |
Electric Fireplace TV Stand |
| Shape |
Oblong |
|

Hecho a m??quina de tela 100% poli??ster resistente a las manchas y elegante
Nuestra alfombra duradera est?? dise?ada para mayor comodidad y estilo
Con una altura de pelo bajo y superficie de lana sint??tica
Esta alfombra ofrece comodidad sin ser demasiado voluminosa para tus mascotas, invitados y ni?os
?Por qu?? necesitas esta alfombra?
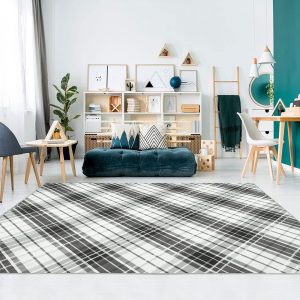
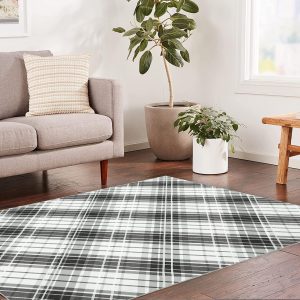
Dise?o moderno a cuadros
- Elegante y duradera, nuestra alfombra de piso de estilo chic es la elecci??n perfecta Con su intrincado dise?o y construcci??n de alta calidad, esta alfombra a?adir?? un toque de elegancia y sofisticaci??n a cualquier habitaci??n de tu hogar.
ALFOMBRA ThinkMax
-
Pila baja
-
Lavable a m??quina
-
Antideslizante
-
Plegable
-
Tacto suave
Superficie de lana sint??tica
Tacto ultrasuave, proporciona una sensaci??n suave y afelpada bajo los pies, asegurando comodidad y estilo en tu hogar.
Parte trasera antideslizante
La parte inferior de la alfombra lavable tiene un respaldo de TPR duradero. Hace que la alfombra sea estable en el suelo y no se deslice f??cilmente, ideal para superficies laminadas y de madera. Reduce el riesgo de tropiezos y protege tus suelos de ara?azos.
Estampado Delicado
Esta alfombra de sala de estar tiene un estilo elegante y simple y un patr??n de rayas ??nico, los tonos modernos a cuadros combinan perfectamente con tu hogar.
F??cil de limpiar
El mantenimiento diario es simple y conveniente, puede utilizar directamente una aspiradora para aspirar los desechos y el polvo. Para una limpieza profunda, esta alfombra se puede lavar en la lavadora, no se decolora ni no se desprende, y se puede reutilizar.


Alfombras lavables a m??quina:
Las alfombras lavables se crean para hacer que el mantenimiento sea muy f??cil.
Utiliza una aspiradora peque?a de mano para eliminar el polvo o el cabello para el cuidado diario.
Lavar a m??quina con agua fr??a en ciclo suave.
No usar cloro ni blanqueador.
La alfombra plegable es una opci??n vers??til para hogares y vidas, empaquetada en su propia bolsa f??cil de manejar.

Enrolla la alfombra en la direcci??n opuesta y col??cala plana por un tiempo. Las arrugas normalmente se aplanan dentro de 1-2 semanas despu??s de desenrollarse. Puede haber un error de 0.4 a 0.8 pulgadas debido a la medici??n manual y la imagen puede no reflejar el color real debido a las diferentes pantallas de monitor y efecto de luz. Para hacer que las alfombras sean m??s duraderas, el patr??n est?? impreso en el forro polar.
Specifications
| Brand |
ThinkMax |
| Size |
8 x 10 FT |
| Material |
Polyester |
| Weave Type |
Machine Made |
| Pile Height |
Low Pile |
| Construction Type |
Machine Made |
| Back Material Type |
Thermoplastic Rubber (TPR) |
| Color |
Black |
| Product Care Instructions |
Machine Wash |
| Pattern |
Plaid |
| Shape |
Rectangular |
| Product Dimensions |
120"L x 96"W |
| Number of Pieces |
1 |
| Model Name |
Area Rug |
| UPC |
198290546459 |
| Item Weight |
18.87 pounds |
|

Convenient drain pipe

Removable filter

Easy to clean
Specifications
| Brand |
ThinkMax |
| Cooling Power |
10000 British Thermal Units |
| Voltage |
115 Volts |
| Noise Level |
51 dB |
| Dry Capacity |
26 L/Day |
| Color |
White |
| Product Dimensions |
13 x 11 x 34 inches |
| Item Weight |
45 pounds |
|


Shinneen Muir –
The 5-layer aluminum filter is a game-changer – it effectively traps grease and eliminates cooking odors. I love how easy it is to clean, simply pop it in the dishwasher for hassle-free maintenance. Cooking in a fresh kitchen has never been easier thanks to this range hood.
YJ –
This range hood served as a basic replacement for the broken NuTonerange hood that came with our house. The old NuTone unit was completely nonfunctional, prompting us to purchase this new one. The product arrived adequately packaged, with only a minor dent in the upper fold on the back of the unit that was hardly noticeable, so we opted not to request a replacement.The NuTone hood I removed had a recess in the top, and the electrical supply from the wall was positioned near the top of the unit about 3 inches over from the corner. In contrast, this unit had a completely flush top with knockouts on the top and rear, about 7 inches in from the corner. To align the power supply with the knockout, I had to cut a section of drywall behind the hood. While this wasn’t a major issue, it was a bit inconvenient.The package included instructions for a recessed cabinet installation, but the unit out of the box was designed for a flush bottom cabinet. Since my cabinets had recessed bottoms, I decided to use longer wood screws with washers to secure the range hood to the bottom shelf in the rear and smaller holes on the front lip of the hood to attach to the front fascia of the cabinet. It was essential to drill pilot holes for the screws, and a 1/8″” drill bit worked perfectly. Once the hood was hung, I made the electrical connections. Note that wire nuts were not provided, so ensure you have some on hand.Overall, the installation process went smoothly, and the unit is securely in place and functioning perfectly. The switches feel sturdy, and we added two LED bulbs and a duct pipe, improving visibility while cooking. Now, we can see what we’re cooking with ease.
Riley Parris –
I purchased this stainless steel range hood as a budget-friendly replacement for my old one that had stopped working. Since we plan to install an over-the-range microwave in the near future, I didn’t want to invest in an expensive hood. However, we needed an exhaust fan in the meantime.The installation process was incredibly straightforward. It took me less than 10 minutes, with only a couple of minutes spent walking up and down the stairs to switch the power on and off in the kitchen.When the package arrived, I found that the box had been left wide open at my door. This was a first for me with Garvee, and it initially caused some concern. However, upon close inspection, everything was in good condition. The only items in the box were the hood – which was undamaged despite the box being open – and an instruction booklet that I didn’t need to use. The mounting screws were located in a plastic bag under the wiring cover, which had to be removed during installation. Initially, I thought the screws were missing, but I later found them underneath the cover. Be sure to check under the cover for the screws!Given that my cabinets have a frame ledge that hangs down 1/2″” below the cabinet on the front and back, I had to use a 1/2″” spacer board between the hood and the cabinet or drill new holes in the hood at the front and back edges to screw into the ledges for mounting. I opted to drill new holes in the hood, using a 3/16 drill bit that worked perfectly with the included screws.I then removed the back wire tab on the hood using a flat-head screwdriver, turned off the power to the kitchen, and passed the power wires from the wall through the tab hole.With my wife’s assistance, I held the lightweight range hood up to the cabinet, ensured we were happy with the placement, and quickly secured the hood to the cabinet with the four included screws. This step took less than 2 minutes.Finally, I connected the white wires from the range hood to the white wire from the wall, the black wires to the black, and attached the ground wire from the wall to the greenish/blue screw on the hood. I then turned the power back on and tested the hood, which worked perfectly.Enjoy your new range hood!
Brittany –
I am glad to hear that the packaging of the range hood was excellent and that it arrived without any dents, scrapes, or scratches.The mounting system of this range hood is better than your previous one, and its lightweight design gives you confidence that the anchors you used are sufficient for installation.Your decision to choose this particular range hood because of the position of the lights was strategic. Having the lights in the front rather than the back provides better lighting for the stovetop, which is a practical feature.It’s fantastic to hear that this hood is much quieter than your previous one. While you haven’t tested its performance in removing smoke, steam, or odors yet, you have high hopes for its effectiveness.The fact that the covers can be easily removed and washed in the dishwasher is a convenient feature that you plan to take advantage of regularly, possibly once a week.Lastly, the digital display and touch buttons on the hood have impressed you, providing a clean and modern interface. Overall, you are very pleased with this range hood and its features.
Choi Jung Min –
I am really happy with my new range hood! It’s incredibly convenient to use, thanks to the built-in lighting, adjustable speed settings, and effective filtration.The lights make it easy to see what I am cooking, and I can adjust the fan speed depending on how much smoke and grease there is. It truly enhances my cooking experience and makes cleanup so much easier.
Jassie –
Looks good.